20.12 Checklist for Wound Cleansing, Irrigation, and Packing
Cleansing is an important step when changing dressings in wounds healing by secondary intention to remove surface debris and to provide optimal visualization for the wound assessment. See Figure 20.35[1] for removal of dressing and wound assessment.

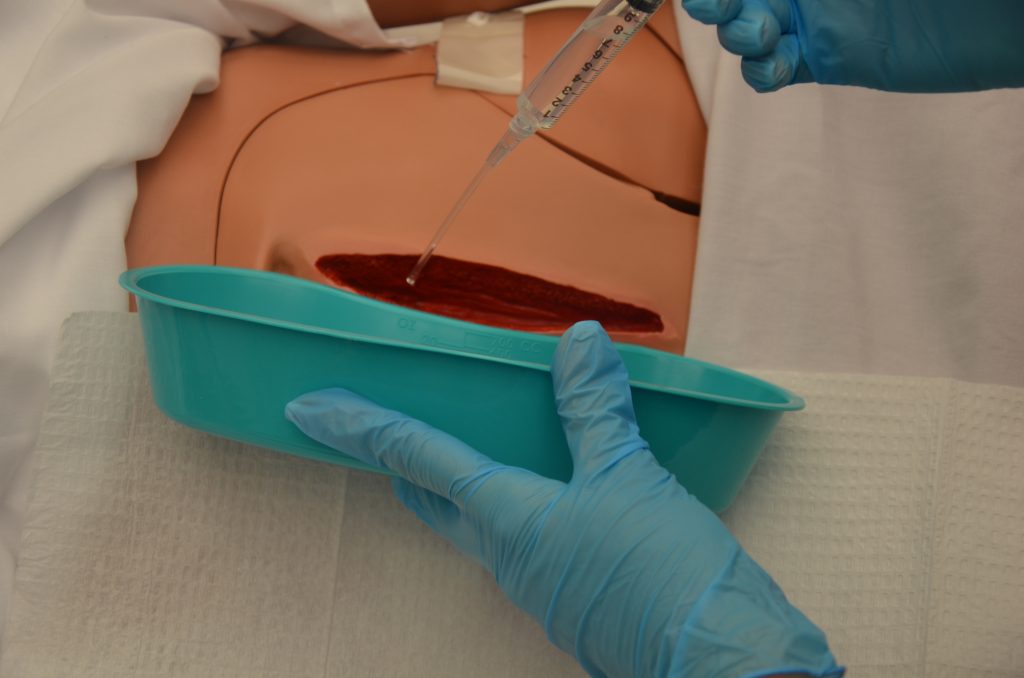
Follow agency policy and provider orders regarding cleansing solution and method. Many wounds can be cleansed with normal saline. See Figure 20.36[2] for an example of wound irrigation.

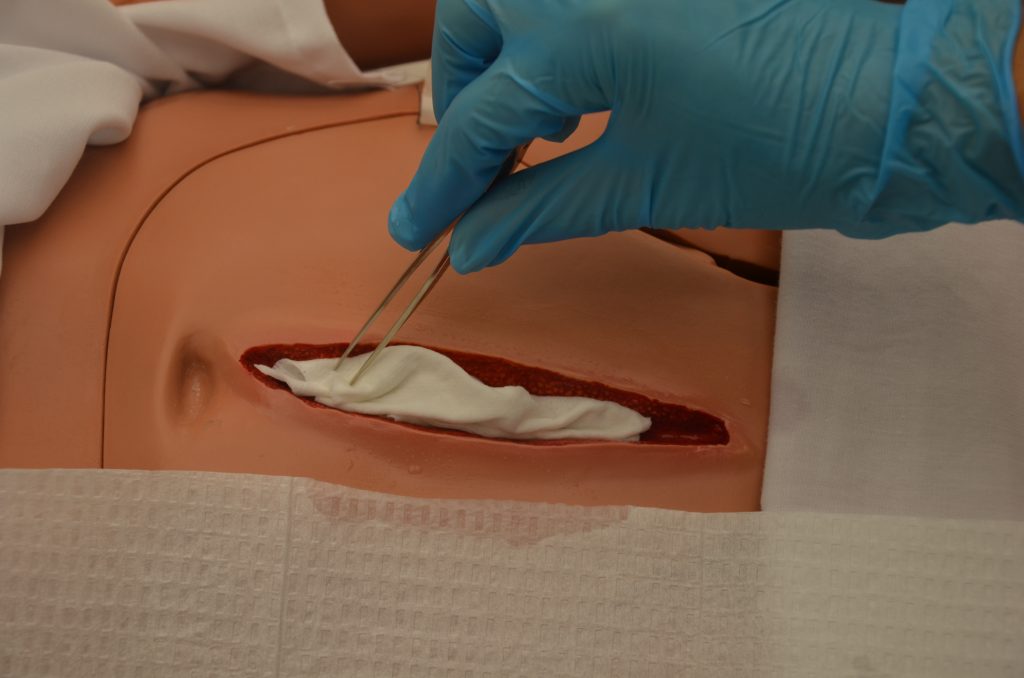
Cleansing solution should be applied with sufficient pressure to cleanse the wound without damaging tissue or driving bacteria into the wound.[3] Following cleansing, the wound may be packed to allow for granulation of new tissue. See Figure 20.37[4] for an example of wound packing.

Checklist for Wound Cleansing, Irrigation, and Packing
Use the checklist below to review the steps for completion of “Wound Cleansing, Irrigation, and Packing.”
Steps
Disclaimer: Always review and follow agency policy regarding this specific skill.
- Gather supplies: syringe, cannula with needleless adaptor, irrigation fluid, basin, waterproof pad, dressing tray with sterile forceps, scissors, skin barrier/protectant, cotton tip applicators, measuring guide, outer sterile dressing, and packing gauze or packing as per physician’s orders.
- Perform safety steps:
- Perform hand hygiene.
- Check the room for transmission-based precautions.
- Introduce yourself, your role, the purpose of your visit, and an estimate of the time it will take.
- Confirm patient ID using two patient identifiers (e.g., name and date of birth).
- Explain the process to the patient and ask if they have any questions.
- Be organized and systematic.
- Use appropriate listening and questioning skills.
- Listen and attend to patient cues.
- Ensure the patient’s privacy and dignity.
- Assess ABCs.
- Confirm the provider order and verify appropriateness of order according to wound assessment.
- Prepare the environment, position the patient, adjust the height of the bed, and turn on the lights. Ensure proper lighting to allow for good visibility to assess the wound. Ensure proper body mechanics for yourself and create a comfortable position for the patient. Position the patient so the wound is vertical to the collection basin, if possible, to allow the solution to flow off the patient.
- Place a waterproof pad under the patient to protect the patient’s clothing and bedding from irrigation fluid.
- Perform hand hygiene and apply clean gloves.
- Remove outer dressing:
- Using sterile forceps, remove the inner dressing (packing) from the wound.
- If the packing sticks, gently soak the packing with normal saline or sterile water and gently lift off the packing. Removing packing that adheres to the wound bed without soaking can cause trauma to the wound bed tissue. If packing material cannot be removed, contact the provider. If packing adheres to the wound, reassess the amount of wound exudate and consider a different packing material. All packing must be removed with each dressing change.
- Confirm the quantity and type of packing are the same as recorded on previous dressing change.
- Assess the wound:
- Note the location and type of wound.
- Measure the wound’s length, width, and depth.
- If undermining or tunneling are present, note the location and measure the depth.
- Determine if the level of tissue damage indicates wound healing or worsening.
- Assess appearance of wound bed, noting color.
- Note presence of odor after cleansing.
- Assess appearance of periwound skin.
- Wound assessment helps identify if the wound care is effective. Always compare the current wound assessment with the previous assessment to determine if the wound is healing, delayed, worsening, or showing signs of infection.
- Apply nonsterile gloves, gown, and goggles or face shield according to agency policy.
- If irrigation is indicated, fill a 35-mL syringe with sterile saline and attach a needleless cannula to the end of the syringe.
- Hold the syringe about 1 inch above the wound and flush gently with continuous pressure until returned fluid is clear:
- Irrigation should be drained into the basin because it is a medium for bacterial growth and subsequent infection.
- Irrigation should not increase patient discomfort.
- Dry wound edges with sterile gauze using sterile forceps to prevent maceration of surrounding tissue from excess moisture.
- Remove goggles or face shield and gloves.
- Perform hand hygiene and apply sterile gloves (if not using sterile forceps) or nonsterile gloves if using sterile forceps.
- Apply a skin barrier/protectant on the periwound skin as needed to prevent saturated packing materials and/or wound exudate from macerating or irritating the periwound skin.
- While maintaining sterility, moisten the gauze with sterile normal saline and wring it out so it is damp but not wet:
- The wound must be moist, not wet, for optimal healing. Gauze packing that is too wet can cause tissue maceration and reduces the absorbency of the gauze.
- Normal saline gauze packing needs to be changed at least once daily.
- Ensure the wound is not overpacked or underpacked as either may diminish the healing process.
- Open the gauze and gently pack it into the wound using sterile forceps or the tip of a sterile, cotton-tipped swab:
- Continue until all wound surfaces are in contact with gauze.
- Do not pack too tightly.
- Do not overlap wound edges with wet packing.
- Apply an appropriate outer dry dressing, depending on the frequency of the dressing changes and the amount of exudate from the wound:
- The dressing on the wound must remain dry on the outside to avoid cross-contamination of the wound. If it becomes saturated before the next dressing change, it must be replaced.
- Discard the supplies.
- Remove gloves and perform hand hygiene.
- Assist the patient to a comfortable position, ask if they have any questions, and thank them for their time.
- Ensure safety measures when leaving the room:
- CALL LIGHT: Within reach
- BED: Low and locked (in lowest position and brakes on)
- SIDE RAILS: Secured
- TABLE: Within reach
- ROOM: Risk-free for falls (scan room and clear any obstacles)
- Document procedure, wound assessment, irrigation solution, and patient response to the irrigation and dressing change. Report any concerns according to agency policy.
- “DSC_1724.jpg,” "SC_1727.jpg,” and “DSC_1730.jpg” by British Columbia Institute of Technology are licensed under CC BY 4.0. Access for free at https://ecampusontario.pressbooks.pub/clinicalskills/chapter/4-5-complex-dressing-change/ ↵
- “DSC_1732.jpg” by British Columbia Institute of Technology is licensed under CC BY 4.0. Access for free at https://ecampusontario.pressbooks.pub/clinicalskills/chapter/4-5-complex-dressing-change/ ↵
- National Pressure Ulcer Advisory Panel, European Pressure Ulcer Advisory Panel, and Pan Pacific Pressure Injury Alliance. (2014). Prevention and treatment of pressure ulcers: Quick reference guide. Emily Haesler (Ed.). https://www.epuap.org/wp-content/uploads/2010/10/Quick-Reference-Guide-DIGITAL-NPUAP-EPUAP-PPPIA-16Oct2014.pdf ↵
- “DSC_1742.jpg” by British Columbia Institute of Technology is licensed under CC BY 4.0. Access for free at https://ecampusontario.pressbooks.pub/clinicalskills/chapter/4-5-complex-dressing-change/ ↵

