7.4 Obtaining Vital Signs
Vital signs are taken upon admission to a facility and then routinely (e.g., weekly in long-term care settings or every shift in inpatient care settings). They are also obtained when there is a change in client condition (e.g., a suspected infection), after a fall, or with some medication changes.
Vital signs are taken at regular intervals to establish a client’s baseline, evaluate trends, and determine if a client is experiencing a variance outside their normal range. Many factors can affect vital signs, including activity level, medications, recent intake, or age.
Vital signs include temperature recorded in Celsius or Fahrenheit, pulse, respiratory rate, blood pressure, and oxygen saturation using a pulse oximeter. Obtaining a pain rating is often considered a sixth vital sign. Read about pain ratings in the “Pain” section of Chapter 6.
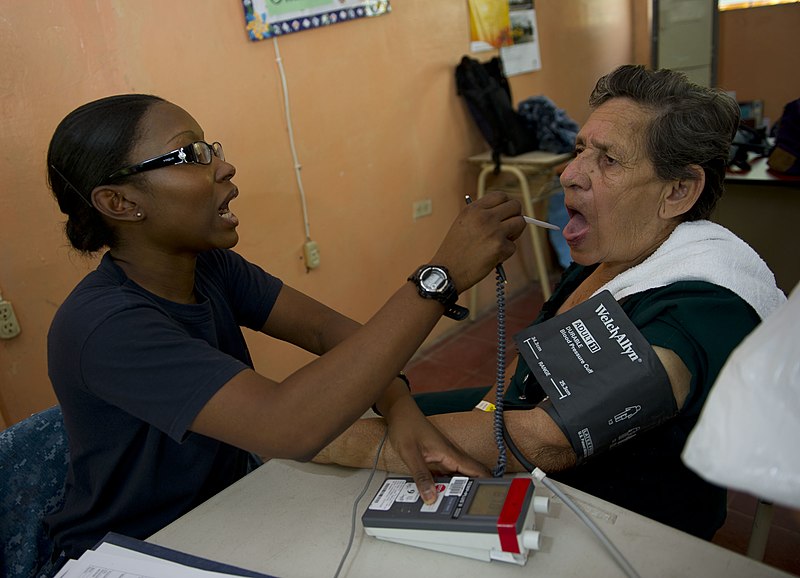
See Figure 7.1[1] for an image of a nursing assistant obtaining vital signs. Obtaining vital signs may be delegated to a nursing assistant for stable patients, depending on the state’s scope of practice for nurse aides and agency policy and training.[2]
Temperature
Accurate temperature measurements provide information about a patient’s health status and guide clinical decisions made by the nurse. For example, an elevated temperature (referred to as a fever) can indicate the client is experiencing an infection. Body temperature is documented in degrees Celsius (ºC) or Fahrenheit (ºF).
There are several methods for measuring body temperature based on the client’s developmental age, cognitive functioning, level of consciousness, health status, and agency policy. Common methods of temperature measurement include oral, axillary, tympanic, rectal, and temporal routes. Each of these routes is further discussed in the following subsections, and Skills Checklists are provided later in the chapter.
When documenting a client’s temperature, it is important to document the route used to obtain the temperature because of normal variations in temperature in different locations of the body. For example, axillary temperature can be one degree or more lower than an oral temperature. See normal temperature ranges according to method in Table 7.5a in the “Normal Ranges for Vital Signs” section of this chapter.
Oral Temperature
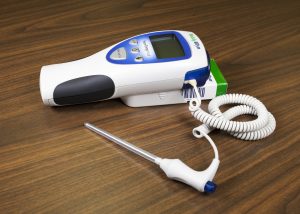
Oral temperature is taken in the mouth under the tongue. Normal oral temperature is 35.8 – 37.3ºC (96.4 – 99.1ºF). An oral thermometer is shown in Figure 7.2.[3] The device has blue coloring indicating its use as an oral or axillary thermometer, as opposed to a rectal thermometer that has red coloring. Oral temperature is reliable when it is obtained close to the sublingual artery at either side of the base of the tongue. Some factors can cause an inaccurate measurement using the oral route. For example, if the patient recently consumed a hot or cold food or beverage, chewed gum, or smoked prior to measurement, a falsely elevated or decreased reading may be obtained. Oral temperature should be taken 15 to 25 minutes following consumption of a hot or cold beverage or food or 5 minutes after chewing gum or smoking.[4]
Axillary Temperature
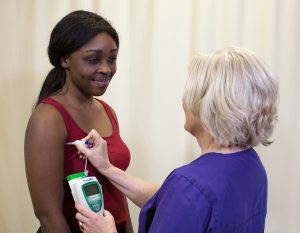
Axillary temperature is taken in the armpit. The axillary method is a minimally invasive way to measure temperature and is commonly used in children or in adults with impaired cognition who may not tolerate oral or tympanic routes. It uses the same electronic device as an oral thermometer (with blue coloring), but the probe is placed in the armpit. The axillary temperature can be as much as one degree lower than the oral temperature. See Figure 7.3.[5] for an image of a nursing assistant taking an axillary temperature.[6]
Tympanic Temperature
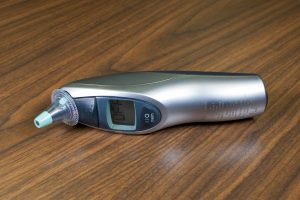
Tympanic temperature is taken using a device placed in the ear. It is more accurate than oral or axillary measurement because the tympanic membrane in the ear shares the same artery that perfuses the hypothalamus (the part of the brain that regulates the body’s temperature). The tympanic temperature is typically 0.3 – 0.6°C higher than an oral temperature. See Figure 7.4[7] of a tympanic thermometer. The tympanic method should not be used if the patient has a suspected ear infection.[8]
Rectal Temperature
Rectal temperature is taken in the rectum. It is the most accurate measurement method but is considered an invasive procedure. Some sources suggest its use only when other methods are not appropriate. However, when measuring infant temperature, it is considered a gold standard because of its accuracy. An adult requiring a rectal temperature should be placed in the Sims’ position. (See Chapter 8 for positioning techniques.) The rectal temperature is usually 1ºC higher than oral temperature. A rectal thermometer has red coloring where the probe attaches to the device to distinguish it from an oral/axillary thermometer.[9] See Figure 7.5[10] for an image of a rectal thermometer.

Temporal Temperature
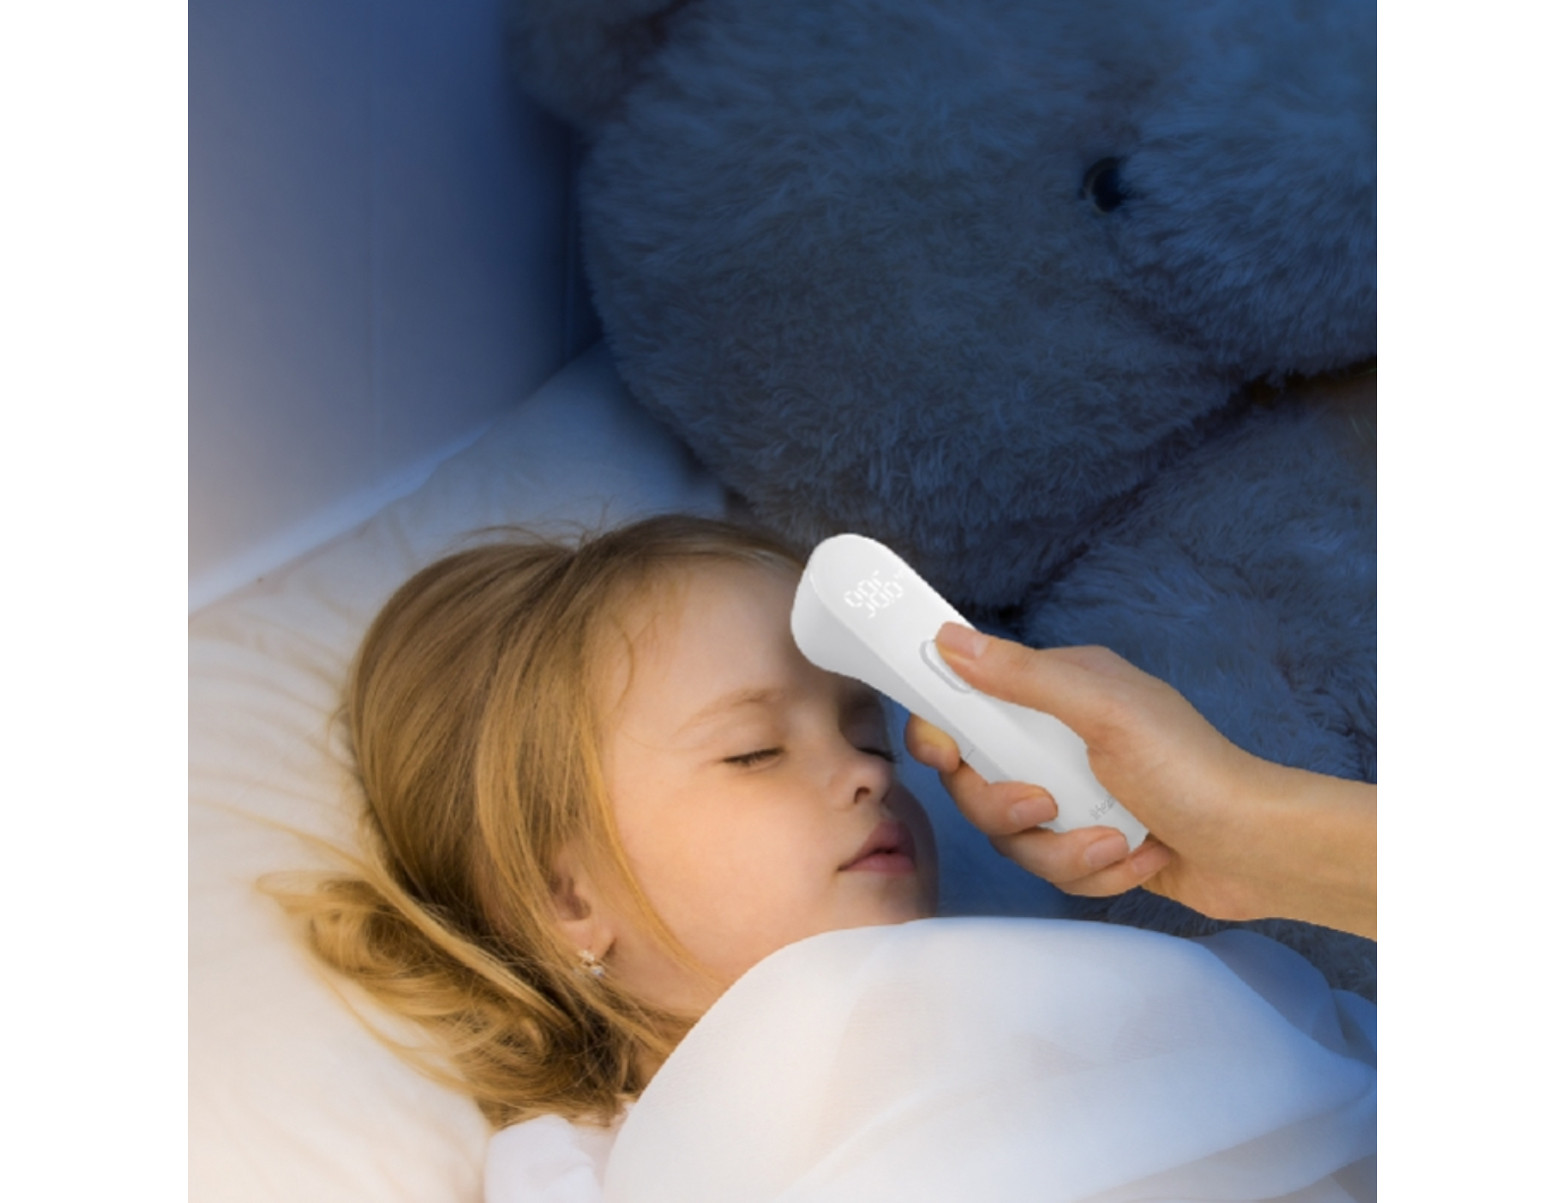
Temporal temperature is taken by using a device placed on the forehead. Temporal thermometers contain an infrared scanner that measures the heat on the surface of the skin resulting from blood moving through the temporal artery in the forehead. Temporal temperature is typically 0.5°F (0.3°C) to 1°F (0.6°C) lower than an oral temperature. It is a quick, noninvasive method, but accurate measurement is dependent on good contact with the skin and good placement on the forehead. See Figure 7.6[11] for an image of a temporal thermometer.
Pulse
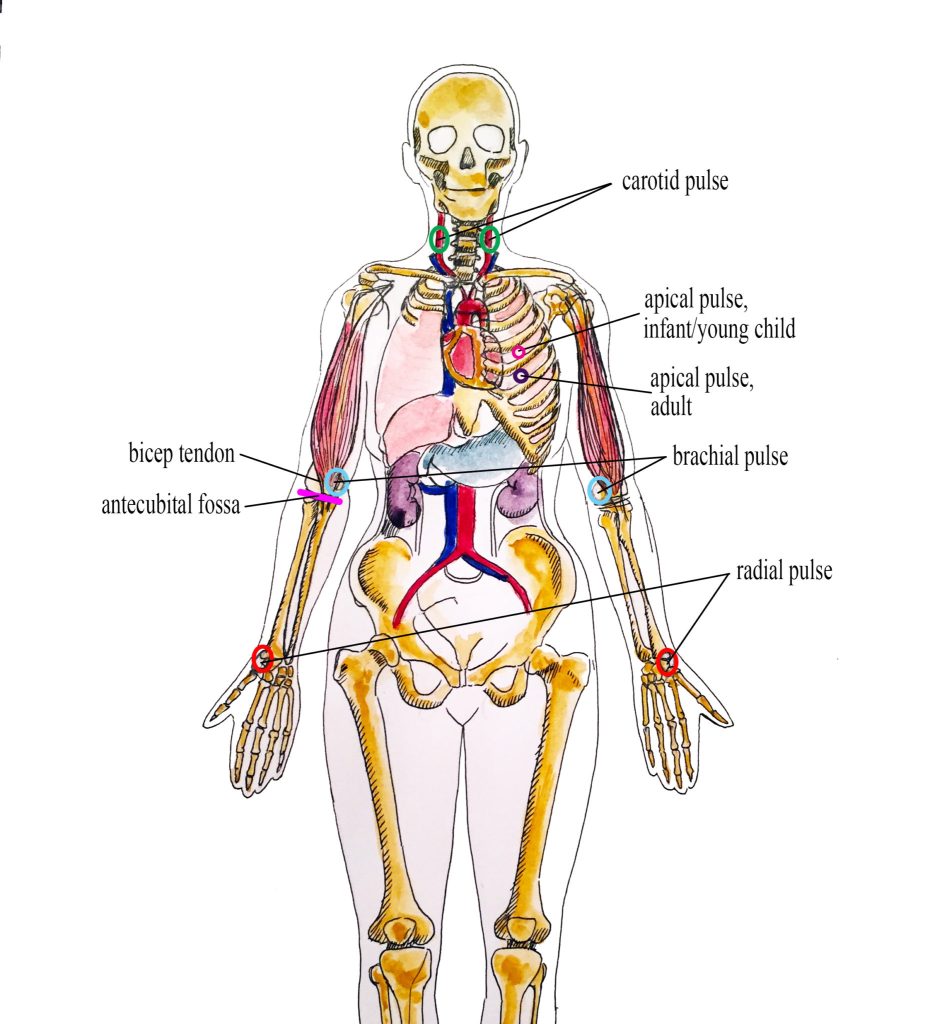
Pulse refers to the pressure wave that expands and recoils arteries when the left ventricle of the heart contracts. It can be palpated at many points throughout the body as shown in Figure 7.7.[12]
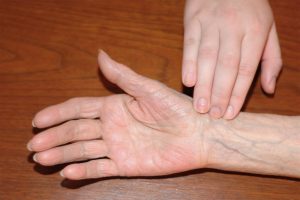
Nursing assistants typically obtain the radial pulse because it is easily accessible. See Figure 7.8[13] for an image of a nursing assistant obtaining a radial pulse. To locate the radial pulse, ask the client to hold the palm of their hand upwards. Draw an imaginary line from the extended index finger of the resident past the wrist to the radial bone and then palpate the radial pulse just inside the radial bone. Use your index and third finger when palpating a pulse; never use the thumb because it has its own pulse, and you may inadvertently count your own heart rate rather than the heart rate of the client. When obtaining a pulse, the patient should be seated comfortably with their arms and legs uncrossed. If the patient is lying down, this may lower their heart rate so their position should be documented.
Pulse is measured in beats per minute. The normal adult pulse rate (heart rate) at rest is 60–100 beats per minute, with different ranges according to age.[14] See normal pulse ranges by age in Table 7.5b in the “Normal Ranges for Vital Signs” section of this chapter.
The pulse rate should be regular, meaning the frequency of the pulsation felt by your fingers is an even tempo with equal intervals between pulsations. However, heart conditions can cause irregularities in heart rate, called arrhythmias. When an irregular pulse is noted, it should be documented and reported to the nurse. It is considered best practice to assess a patient’s pulse for a full 60 seconds, especially if there is an irregularity to the rhythm.[15]
Respiration
Respiration refers to a person’s breathing and the movement of air into and out of the lungs. Inspiration refers to the process causing air to enter the lungs, and expiration refers to the process causing air to leave the lungs. A respiratory cycle (i.e., measured as one breath for the respiratory rate) is one sequence of inspiration and expiration (i.e., the chest rises and falls once).[16]
The quality of a person’s breathing is normally relaxed and silent. However, loud breathing, nasal flaring, or the use of accessory muscles in the neck, chest, or ribs is a sign of breathing problems (referred to as respiratory distress). People who are experiencing respiratory distress naturally assume a tripod position, meaning they lean forward and place their arms or elbows on their knees or on a bedside table to help improve lung expansion. If a patient is demonstrating new signs of respiratory distress as you are obtaining their vital signs, immediately notify the nurse.[17]
Respirations normally have a regular rhythm in children and adults who are awake. A regular rhythm means that the frequency of the respiration follows an even tempo with equal intervals between each respiration. However, newborns and infants commonly exhibit an irregular respiratory rhythm.[18]
Normal respiratory rates vary based on age. The normal resting respiratory rate for adults is 12–20 breaths per minute, whereas infants younger than one year old normally have a respiratory rate of 30–60 breaths per minute.[19] See normal respiratory rate ranges by age in Table 7.5c in the “Normal Ranges for Vital Signs” section of this chapter.
When obtaining a respiratory rate, the most accurate measurement is obtained when the client is not aware you are watching their breathing; knowing they are being observed can unconsciously change their breathing pattern. For this reason, many nursing assistants count the client’s respirations while they appear to be taking their pulse. (This is one exception to the standard rule of explaining to the client what you will be doing.)
When counting respirations, it can be difficult to see a complete respiratory cycle. Respirations can be observed by looking at the client’s shoulders move up and down with each breath, the stomach or chest rising and falling, or the clothing around the ribs moving. You may have to ask the client to remain quiet while respirations are being observed because talking or moving changes the respiratory rate. Respirations are documented as the number of breaths per minute, with each cycle of inspiration and exhalation counting as one breath.
Blood Pressure
Blood pressure is the measurement of the force of blood against the walls of the arteries as the heart pumps blood through the body. It is reported as millimeters of mercury (mmHg). This pressure inside the arteries changes when the heart is contracting compared to when the heart is resting and filling with blood. For this reason, blood pressure is expressed as two numbers called systolic pressure and diastolic pressure (e.g., 120/80). Systolic blood pressure (the top number of the fraction) is the pressure in the arteries during systole (i.e., when the ventricles are contracting and causing the ejection of blood into the aorta and pulmonary arteries). Diastolic blood pressure (the bottom number of the fraction) is the resting pressure in the arteries during diastole (i.e., the phase between each contraction of the heart when the ventricles are filling with blood).[20]
Depending on your state’s scope of practice for nursing assistants and the training you receive at the facility where you work, you may be delegated the task of taking blood pressure with an automated cuff. Be aware of the client’s health status because there are circumstances when blood pressure should not be taken on a certain arm, such as an arm containing a fistula for dialysis, an intravenous (IV) line, or implanted birth control. If the person has had a mastectomy, blood pressure should not be taken on the arm on the side of the mastectomy.
When obtaining a blood pressure, allow the person to rest in place for a few minutes or an inaccurately high blood pressure may be obtained due to recent activity. Position the person in a seated position with their legs and arms uncrossed and the elbow of their arm at heart level supported by a table or your arm. Lying down or standing will change the blood pressure reading, so document if the client is standing, sitting, or lying down when the blood pressure is measured.
Raise the client’s sleeve or assist the client to remove their arm from their sleeve. Place the artery marker on the blood pressure cuff directly on the skin above the client’s brachial artery. To find the brachial artery, gently flex the arm and feel for the bicep muscle, which is the larger muscle of the upper arm. The brachial artery is located towards the inside of the base of the bicep muscle.
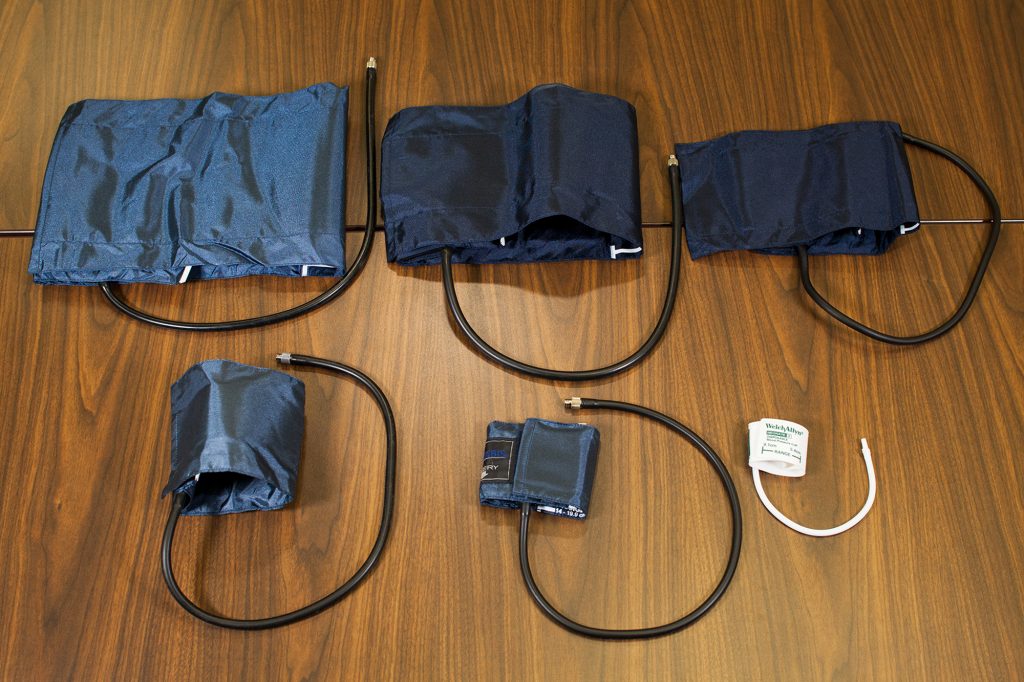
See the different sizes of blood pressure cuffs in Figure 7.9.[21] In adults, “regular” or “large” cuffs are typically used based on the size of the client’s upper arm.
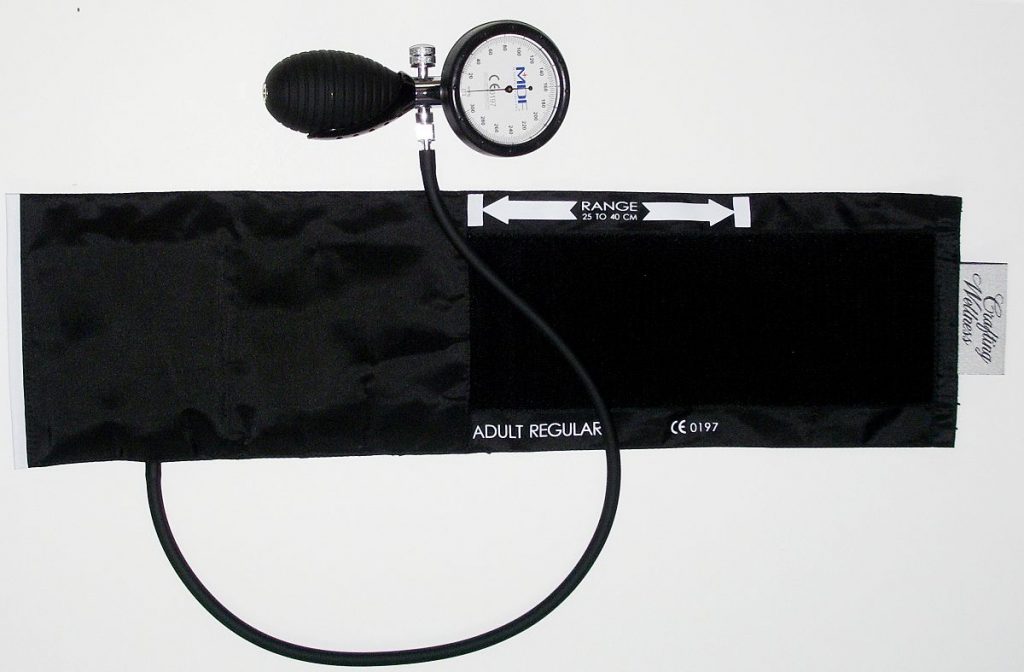
It is vital to ensure the cuff fits appropriately on the person’s arm in order to obtain an accurate blood pressure measurement. An undersized cuff will cause an artificially high blood pressure reading, and an oversized cuff will produce an artificially low reading. When applying the cuff to the client’s arm, the end of the cuff should be within the indicated range margins on the cuff. See Figure 7.10[22] for an image of the range designated on the cuff.
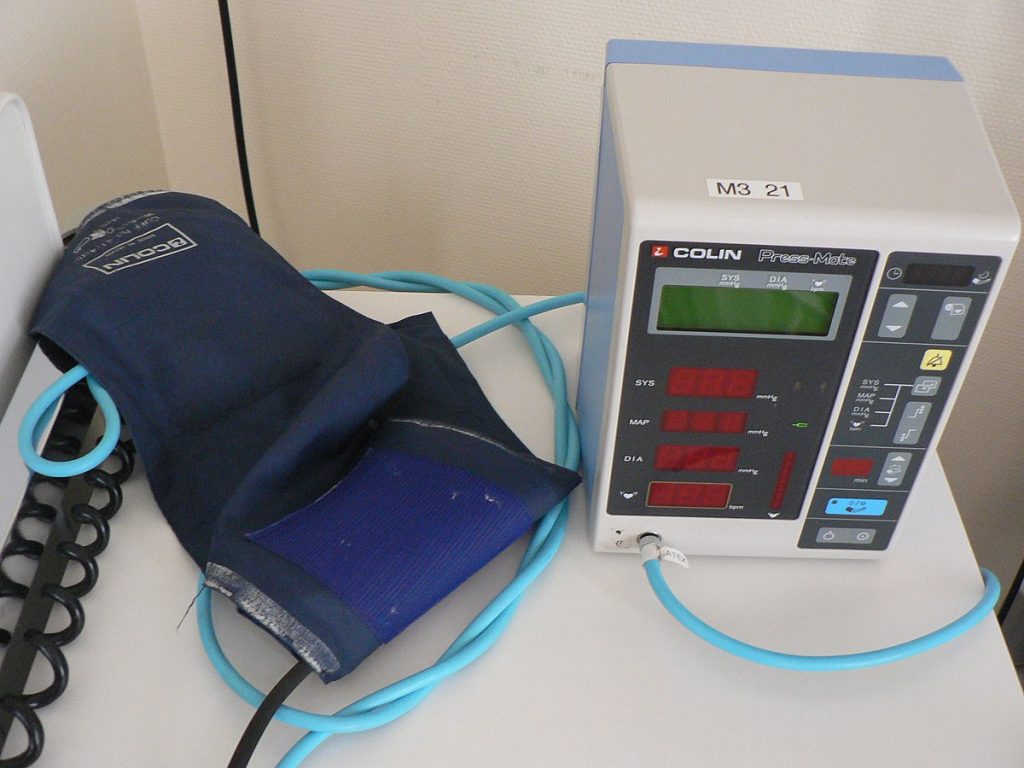
After the cuff is in place, press the start button on the monitor. The cuff will automatically inflate to a specific pressure and then deflate at a rate of 2 mmHg per second. The monitor digitally displays the blood pressure reading when it is done. See Figure 7.11[23] for an image of an automatic blood pressure monitor. Abnormal blood pressure readings should be promptly reported to the nurse. See normal and abnormal blood pressure ranges in Table 7.5d in the “Normal Ranges for Vital Signs” section of this chapter.
Oxygen Saturation
Patient oxygenation status is assessed routinely using pulse oximetry. Oxygen saturation, also referred to as SpO2, is a client’s oxygenation status measured by a pulse oximeter. SpO2 estimates a person’s oxygenation level based on how much hemoglobin in their red blood cells is “saturated” with oxygen. The target range of SpO2 for an adult is 94-98%. For patients with chronic respiratory conditions, such as chronic obstructive pulmonary disease (COPD), their normal range for SpO2 is often lower (e.g., 88% to 92%).
Although SpO2 is an efficient, noninvasive method to assess a patient’s oxygenation status, it is an estimate and not always accurate. For example, severe anemia (i.e., decreased level of hemoglobin in the blood) or decreased peripheral circulation can cause an inaccurately low SpO2 level.[24]
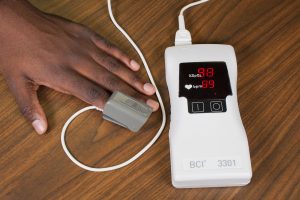
A pulse oximeter includes a sensor that measures light absorption of hemoglobin to estimate oxygen saturation. See Figure 7.12[25] for an image of a pulse oximeter. The sensor can be attached to the patient using a variety of devices. For intermittent measurement of oxygen saturation, a spring-loaded clip is attached to a patient’s finger or toe. However, this clip is too large for use on newborns and young children, so the sensor is typically taped to a finger or toe. An earlobe clip is an alternative for patients who cannot tolerate the finger or toe clip or have a condition (such as vasoconstriction and poor peripheral perfusion) that can affect the results. Fingernail polish causes inaccurate measurement and should be removed from the nail of the finger being used for measurement.[26]
When documenting a client’s oxygen saturation level, it is vital to document if the client was receiving supplemental oxygen or if the reading was taken while they were breathing room air. If supplemental oxygen was being provided, the type of oxygenation device and the amount of oxygen being delivered should also be documented (e.g., “Oxygen saturation of 90% while receiving oxygen via nasal cannula at 2 Liters/minute”).
- “US Navy 110714-N-RM525-060 Hospitalman Seckisiesha Isaac, from New York, prepares to take a woman's temperature at a pre-screening vital signs stat.jpg” by U.S. Navy photo by Mass Communication Specialist 2nd Class Jonathen E. Davis is licensed under CC0 ↵
- This work is a derivative of Nursing Skills by Chippewa Valley Technical College and is licensed under CC BY 4.0 ↵
- “Thermometer-oral-768x548.jpg” by British Columbia Institute of Technology is licensed under CC BY 4.0. Access for free at https://med.libretexts.org/Bookshelves/Nursing/Book%3A_Vital_Sign_Measurement_Across_the_Lifespan_(Lapum_et_al.)/02%3A_Temperature/2.17%3A_Oral_Temperature ↵
- This work is a derivative of Nursing Skills by Chippewa Valley Technical College and is licensed under CC BY 4.0 ↵
- “Axilla-Temperature-1-768x596.jpg” by British Columbia Institute of Technology is licensed under CC BY 4.0. Access for free at https://med.libretexts.org/Bookshelves/Nursing/Book%3A_Vital_Sign_Measurement_Across_the_Lifespan_(Lapum_et_al.)/02%3A_Temperature/2.19%3A_Axillary_Temperature ↵
- This work is a derivative of Nursing Skills by Chippewa Valley Technical College and is licensed under CC BY 4.0 ↵
- “Tympanic-Thermometer.jpg” by British Columbia Institute of Technology is licensed under CC BY 4.0. Access for free at https://med.libretexts.org/Bookshelves/Nursing/Book%3A_Vital_Sign_Measurement_Across_the_Lifespan_(Lapum_et_al.)/02%3A_Temperature/2.18%3A_Tympanic_Temperature ↵
- This work is a derivative of Nursing Skills by Chippewa Valley Technical College and is licensed under CC BY 4.0 ↵
- This work is a derivative of Nursing Skills by Chippewa Valley Technical College and is licensed under CC BY 4.0 ↵
- “Rectal Thermometer” by Myra Reuter for Chippewa Valley Technical College is licensed under CC BY 4.0 ↵
- “49894280938_74504454c3_h” by Adafruit Industries is licensed under CC BY-NC-SA 2.0 ↵
- “Radial-brachial-carotid-and-apical-pulse-final-930x1024.jpg” by British Columbia Institute of Technology is licensed under CC BY 4.0. Access for free at https://med.libretexts.org/Bookshelves/Nursing/Book%3A_Vital_Sign_Measurement_Across_the_Lifespan_(Lapum_et_al.)/03%3A_Pulse_and_Respiration/3.15%3A_What_is_Pulse%3F ↵
- “Radial-pulse-correct.jpg” by British Columbia Institute of Technology is licensed under CC BY 4.0. Access for free at https://med.libretexts.org/Bookshelves/Nursing/Book%3A_Vital_Sign_Measurement_Across_the_Lifespan_(Lapum_et_al.)/03%3A_Pulse_and_Respiration/3.18%3A_Radial_Pulse ↵
- This work is a derivative of Nursing Skills by Chippewa Valley Technical College and is licensed under CC BY 4.0 ↵
- This work is a derivative of Nursing Skills by Chippewa Valley Technical College and is licensed under CC BY 4.0 ↵
- This work is a derivative of Nursing Skills by Chippewa Valley Technical College and is licensed under CC BY 4.0 ↵
- This work is a derivative of Nursing Skills by Chippewa Valley Technical College and is licensed under CC BY 4.0 ↵
- This work is a derivative of Nursing Skills by Chippewa Valley Technical College and is licensed under CC BY 4.0 ↵
- This work is a derivative of Nursing Skills by Chippewa Valley Technical College and is licensed under CC BY 4.0 ↵
- This work is a derivative of Nursing Skills by Chippewa Valley Technical College and is licensed under CC BY 4.0 ↵
- “BP-Multiple-Cuff-Sizes.jpg” by British Columbia Institute of Technology (BCIT) is licensed under CC BY 4.0. Access for free at https://opentextbc.ca/vitalsign/chap ter/how-is-blood-pressure-measured/ ↵
- “Sphygmomanometer&Cuff.JPG” by ML5 is in the Public Domain ↵
- “Automatische bloeddrukmeter (0).jpg” by Harmid is in the Public Domain ↵
- This work is a derivative of Nursing Skills by Chippewa Valley Technical College and is licensed under CC BY 4.0 ↵
- “02-Sat-Apparatus-1-1-1024x682.jpg” by British Columbia Institute of Technology is licensed under CC BY 4.0. Access for free at https://med.libretexts.org/Bookshelves/Nursing/Book%3A_Vital_Sign_Measurement_Across_the_Lifespan_(Lapum_et_al.)/04%3A_Oxygen_Saturation/4.09%3A_How_is_Oxygen_Saturation_Measured%3F ↵
- This work is a derivative of Nursing Skills by Chippewa Valley Technical College and is licensed under CC BY 4.0 ↵
Temperature recorded in Celsius or Fahrenheit, pulse, respiratory rate, blood pressure, and oxygen saturation using a pulse oximeter.
Temperature taken in the mouth under the tongue.
Temperature taken in the armpit using the same device as when taking an oral temperature. It can be as much as one degree lower than the oral temperature.
Temperature taken using a device placed in the ear.
Temperature taken in the rectum.
Temperature taken by using a device placed on the forehead that measures the heat on the surface of the skin resulting from blood moving through the temporal artery in the forehead.
The pressure wave that expands and recoils arteries when the left ventricle of the heart contracts.
A person’s breathing and the movement of air into and out of the lungs.
Problems breathing.
A position that people experiencing respiratory distress naturally assume by leaning forward and placing their arms or elbows on their knees or on a bedside table to help improve lung expansion.
The force of blood against the walls of the arteries as the heart pumps blood through the body reported in millimeters of mercury (mmHg).
The maximum pressure within the arteries during systole.
The phase of the heartbeat when the ventricles contract, causing the ejection of blood into the aorta and pulmonary arteries.
Resting pressure within the arteries during diastole.
The phase between each contraction of the heart when the ventricles are filling with blood.
Oxygenation status by a pulse oximeter based on how much of hemoglobin in red blood cells is “saturated” with oxygen.

