3.2 Lab Activities
3.2 Lab – Arterial Puncture
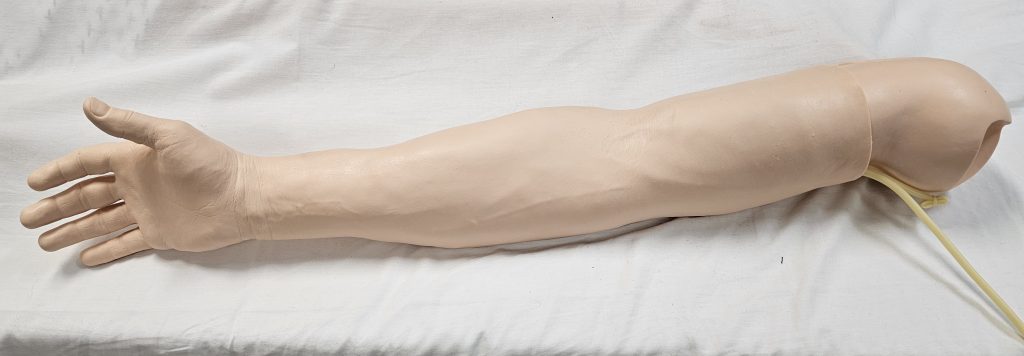
For this lab activity, you will need to gather the supplies below and either obtain an arterial arm manikin or a navel orange to simulate the skin.

- Pre-heparinized syringe
- Needles (choose a size that is appropriate for the site)
- A safety syringe with a needle cover that allows the syringe to be capped before transport, without manually recapping (this is best practice for radial blood sampling)
- A gauze and bandage to cover the puncture site after collection
- A container with crushed ice for transportation of the sample to the laboratory (if the analysis is not done at the point of care)
- Where applicable, local anesthetic and an additional single-use sterile syringe and needle
On your arterial arm manikin or navel orange, practice the arterial puncture using the steps below[1]:
- Approach the patient, introduce yourself, and ask the patient to state their full name and date of birth.
- Place the patient on their back, lying flat. Ask for assistance if the patient’s position needs to be altered to make them more comfortable. If the patient is clenching their fist, holding their breath, or crying, this can change breathing and thus alter the test result.
- Perform hand hygiene and put on gloves. Locate the radial artery by performing an Allen test for collateral circulation. If the initial test fails, repeat the test on the other hand. Make sure when assessing a patient’s limbs that you look for any identifier that would exclude that limb. These could include restricted extremities due to dialysis fistulas, history of mastectomy, etc. Most facilities will place a “restricted extremity” wrist band on the limb that should not be used for blood draws. Once a site is identified, note anatomic landmarks to be able to find the site again.
- Clear off a bedside work area and prepare the supplies. Use proper personal protective equipment, if exposure to blood is anticipated.
- Disinfect the sampling site on the patient with 70% alcohol and allow it to dry.
- If the needle and syringe are not preassembled, assemble the needle and heparinized syringe and pull the syringe plunger to the required fill level recommended by the local laboratory.
- Holding the syringe and needle like a dart, use the index finger to locate the pulse again. Inform the patient that the skin is about to be pierced and then insert the needle at a 45-degree angle, approximately 1 cm distal to (i.e., away from) the index finger to avoid contaminating the area where the needle enters the skin.
- Advance the needle into the radial artery until a blood flashback appears and then allow the syringe to fill to the appropriate level. DO NOT pull back the syringe plunger.
- Withdraw the needle and syringe; place a clean, dry piece of gauze or cotton wool over the site and have the patient or an assistant apply firm pressure for sufficient time to stop the bleeding. Check whether bleeding has stopped after 2–3 minutes. Five minutes or more may be needed for patients who have high blood pressure, a bleeding disorder, or taking anticoagulants.
- Activate the mechanisms of a safety needle to cover the needle before placing it in the ice cup. Expel any air bubbles, cap the syringe, and roll the specimen between the hands to gently mix it. Capping the syringe is done to prevent contact between the arterial blood sample and the air and to prevent leaking during transport to the laboratory.
- Label the sample syringe with your initials, date/time, and FiO2 or O2 liter flow.
- Dispose appropriately of all used materials and personal protective equipment.
- Remove gloves and wash the hands thoroughly with soap and water and then dry the hands using single-use towels; an alternative to soap and water is to use an alcohol-rub solution.
- Check the patient site for bleeding (if necessary, apply additional pressure) and thank the patient.
- Transport the sample immediately to the laboratory or place the sample on ice if it cannot be tested within 30 minutes and ensure to follow laboratory handling procedures.
- U.S. National Library of Medicine. (2010). Arterial blood sampling. WHO Guidelines on Drawing Blood: Best Practices in Phlebotomy. https://www.ncbi.nlm.nih.gov/books/NBK138661/ ↵

